


Tempeh Makin'
and instructions for a DIY fermentation chamber

Back when I lived in the UK, I had a local Asian market where I could buy a huge block of tempeh for 2 pounds. This was where I learned to appreciate this delicious and nutritious fermented food. When I moved back to Canada, any tempeh I could find was expensive and came in tiny packages. It took me a few years until I finally decided to experiment with making my own. I was inspired by a friend who had visited Noma in Copenhagen, where they were said to serve up the world’s finest veggie burger, a quinoa tempeh burger marinated in mushroom garum. I was determined to try and recreate it, but knew I had to grasp the basics first. Upon first glance, it seemed like a lengthy task without much pay-off. Cooking up the soybeans, then dehulling them.. I tried to skip the dehulling step and found it made for patchy colonization. Then I had to find a way to keep them in a specific temperature range for up to 2 days. Without a dedicated fermentation chamber, I attempted to do this either by keeping it in the oven with a light on (where it was doomed to be accidentally cooked when I inevitably forgot it was in there), or even just wrapped in blankets with a hot water bottle (which worked but was a little unreliable). In Indonesia, where tempeh originated, their ambient temperature is often warm enough that it can be made without any additional heat. But here in the Great White North that is not the case.
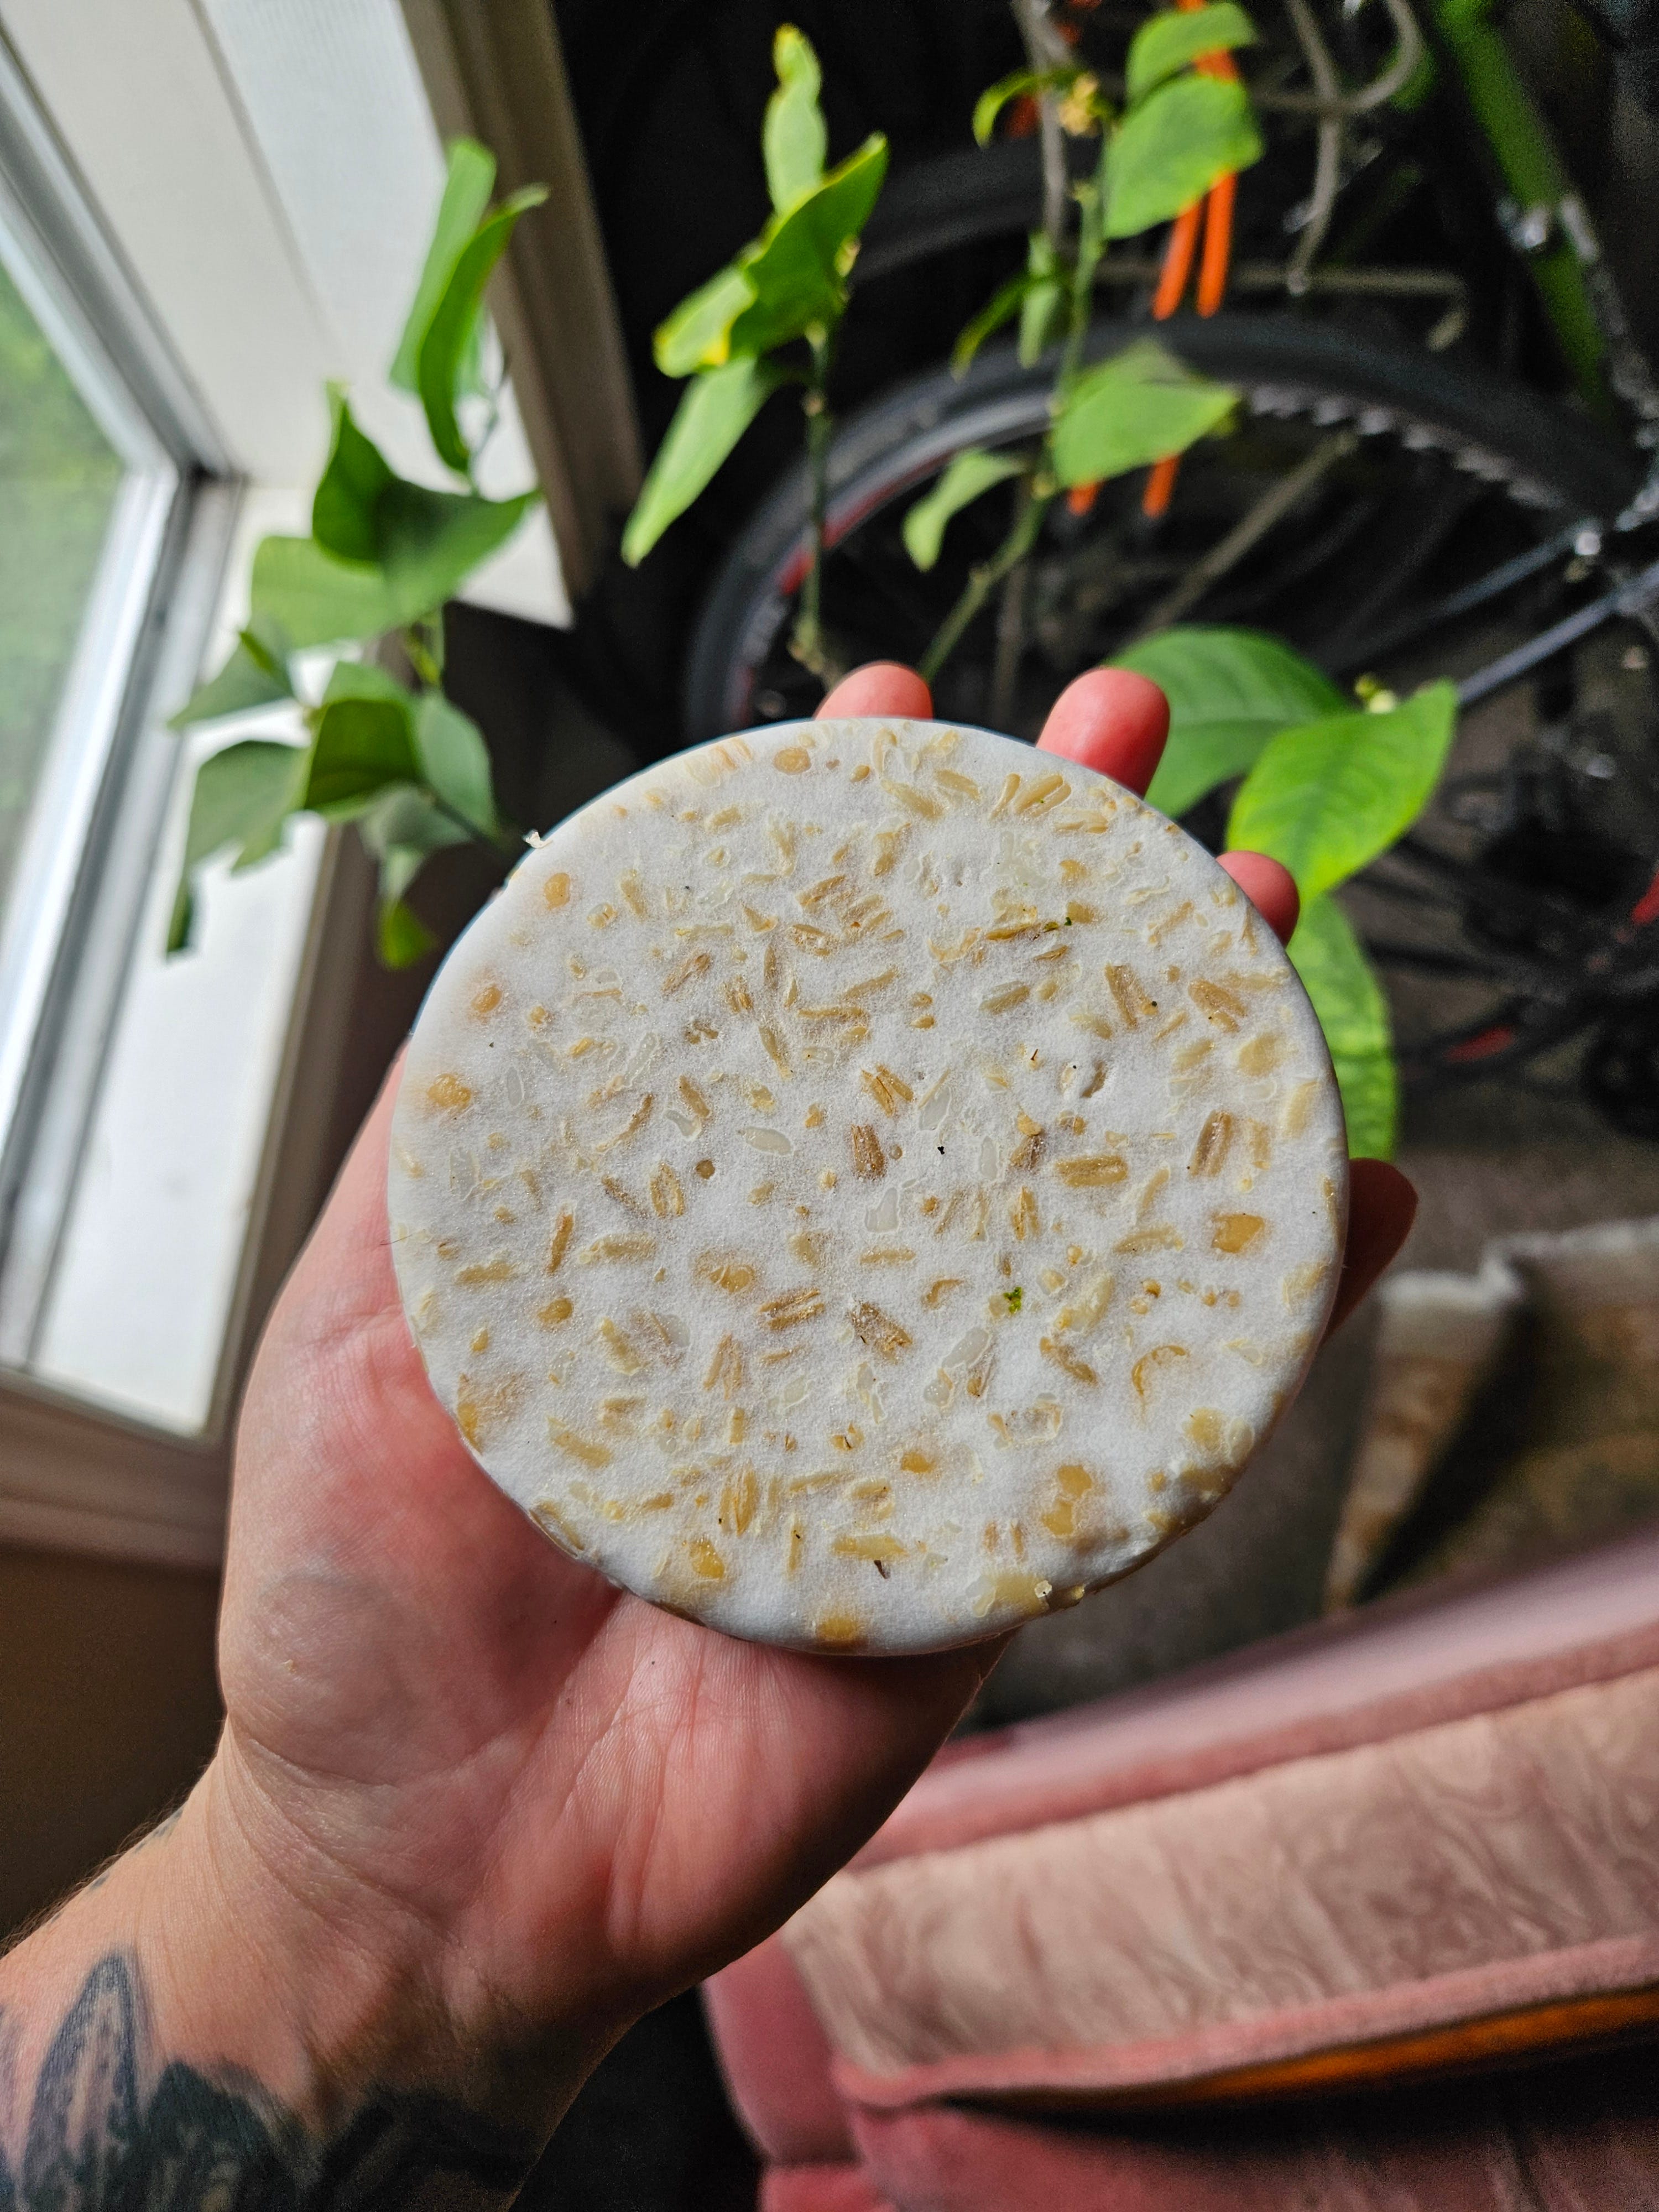
After some time spent experimenting and researching, I massively improved my tempeh making with 2 simple steps. The first was easy - I ditched the soybeans, and started making tempeh with grains and beans that didn’t require hulling. Split chickpeas are still my go-to, as they come without hulls and cook up quickly. Grains such as quinoa, wheat berries, and oat groats (whole oats) make a delicious, toothsome tempeh as well, especially when mixed with beans. Once I got confident, I started using tempeh as a way to use up leftover beans and grains. Every once in a while when cooking I just double the amount, and use the leftovers to make tempeh.
The second step was using a fermentation chamber. Turns out, making my own was surprisingly simple. The chamber allowed me to have more control over the temperature. Once I started using one, I started having much more success, with every batch coming out beautiful and dense. There are many different ways to make a fermentation chamber, and while mine is definitely more on the cheap and cheerful side, it still works very well.
The basic design is an insulative container, with a heat source, and a controller. For mine I used a styrofoam cooler, a seedling heat mat, and a temperature controller. The mat and controller probably set me back $50, but quickly earned their keep after the first few batches of incredibly cheap tempeh. The cooler I got for free. On the inside of the cooler, I have my heat mat with a baking rack set on top, and the probe for the temperature controller. I set the controller to 81 degrees F about 15 minutes before I put in my tempeh to bring it up to temperature.
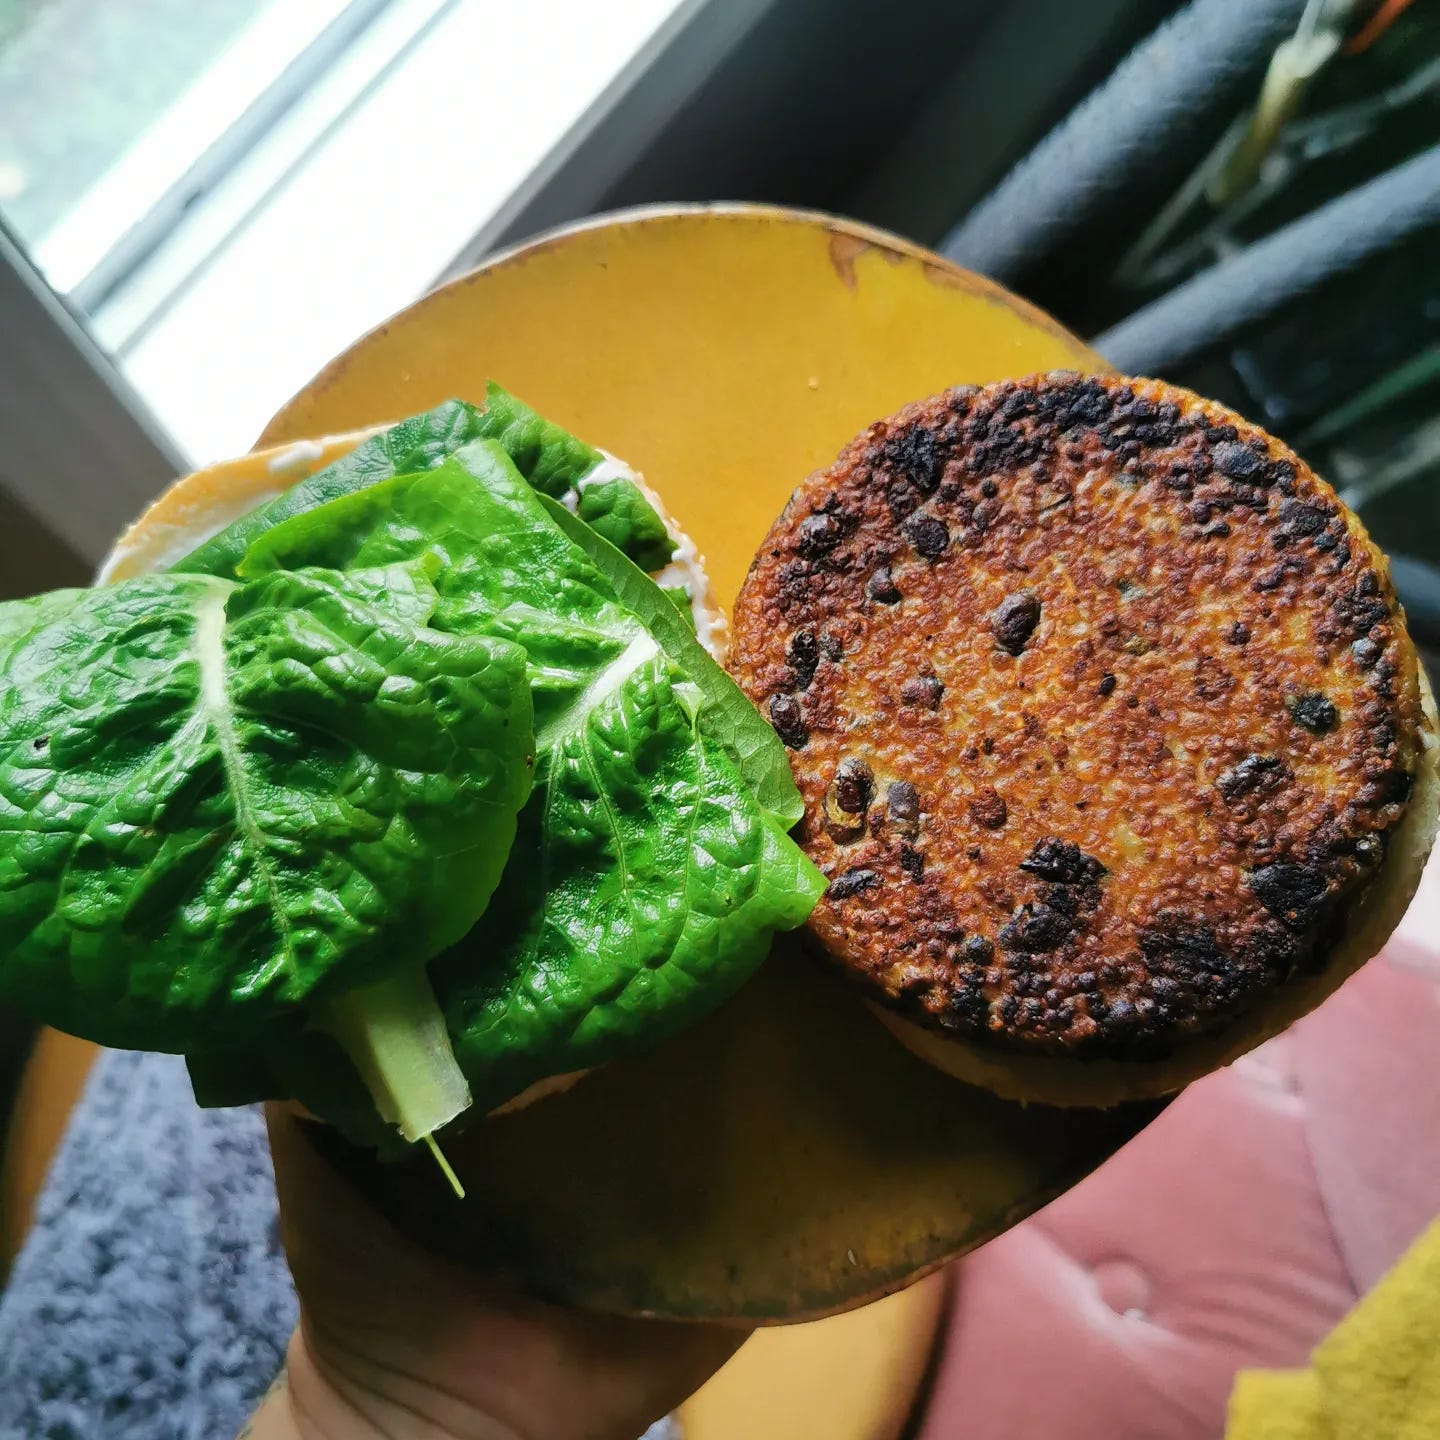
The method for making tempeh at home is more of an art, kind of like making sourdough. Of course there are recipes abound on the internet, but you don’t really need one, once you get the concept down. Cook your grains and/or beans until done (slightly undercooked is better than overcooked). Hull them if they have hulls. Dry them well - I usually pat them dry with a clean towel, but will also turn my hairdryer on them if required. Add them to a bowl with a good sprinkle of tempeh starter (I suggest Raprima brand, it can be kept in the freezer and used when needed, one bag will last years) and a splash of vinegar. Mix well, then decant into your container. This can be almost anything - a silicone mold, a plastic bag with holes poked in it, or my personal favourite, small cake tins (they create a dense round tempeh that can be sliced into burger shapes). Whatever it is, the tempeh needs to breathe, so make sure there are holes. I cover my cake tins with aluminum foil and poke holes in the top. Make sure your mix is tightly pressed together, you want everything to be making good contact.
Next you put your tempeh in your fermentation chamber. The hot water bottle and blankets, or oven with the light on, will work. They are probably not a bad place to start if you aren’t sure about investing in a chamber. You want the tempeh to stay between 80-90 degrees Fahrenheit, the hotter it is, the quicker the mycelium will colonize. Check on your tempeh after 12 hours, then every 2-4 hours after that. Mine is usually done at around 24-28 hours, but has taken as long as 48. It is pretty amazing to watch the white fuzz appear and stitch everything together into a thick mat. When you eat tempeh, you are eating both the original substrate (beans or grains) and a fungi (Rhizopus oligosporus). This creates both an excellent nutritional profile and a delicious umami flavour. If that wasn’t enough, making tempeh is a very frugal endeavor. Even using all organic grains and beans, I can make 8 tempeh burgers for under $4.
I personally like to make big batches of tempeh, marinade it overnight, cook it, and then freeze. Kept ‘raw’ in the fridge, it’s only a few days until the fungi begins to spore, which creates an unappetizing black colour. If this happens, don’t fret, as you now have tempeh spores that are needed to make tempeh starter - dehydrate your tempeh, grind it up, and then use as you would purchased starter.
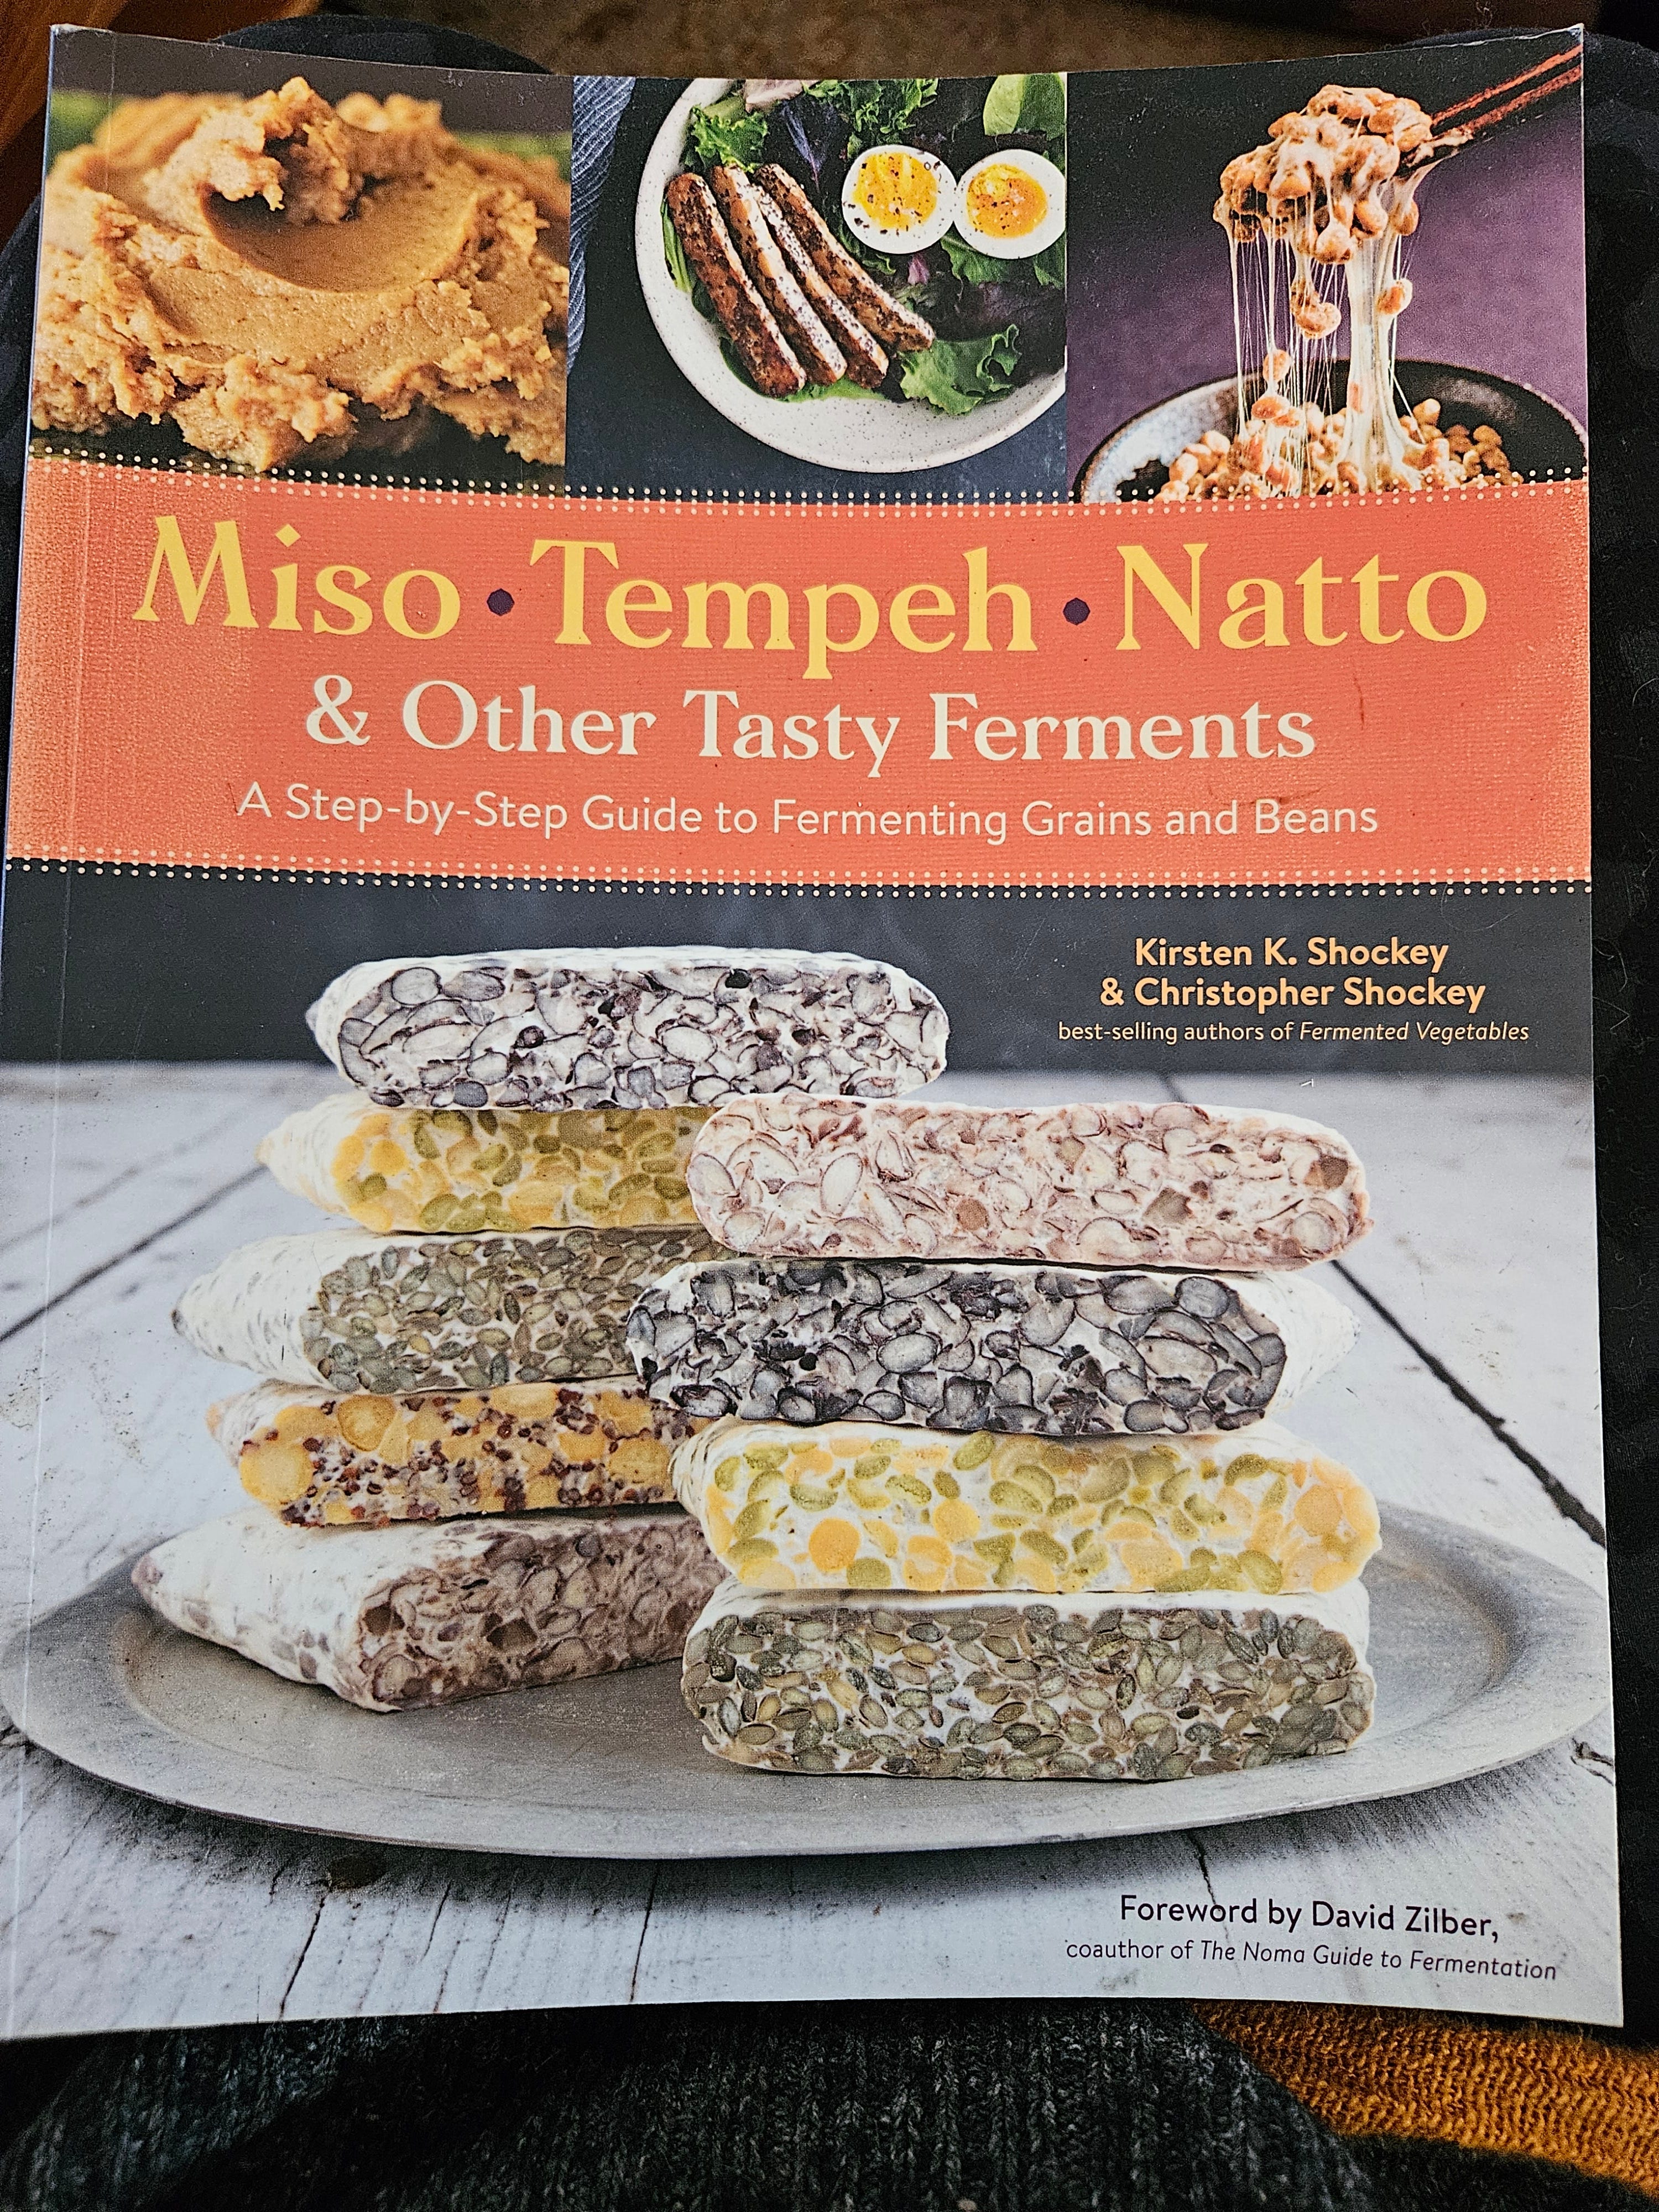
I’d like to acknowledge that much of my tempeh knowledge has been acquired from two sources - the ‘Tempeh Makers’ Facebook group, and the book ‘Miso, Tempeh, Natto and Other Tasty Ferments’ by Kirsten K. Shockey and Christopher Shockey. They’ve written many excellent fermentation books, and I highly recommend anyone interested in fermentation check out Kirsten’s Substack Fermenting Change.
There’s a reason why tempeh is such a popular food - the simple transformation from bean or grain to tempeh increases nutrition, enhances flavour, and offers some variation for your diet. Add in some frugality and self-sufficiency and it’s a natural addition to the fermenter’s arsenal.